Custom die-cut stickers are one of the most satisfying things to print — and far less complicated than they look. With Adobe Illustrator you can add a custom DIECUT line (the cut line) to any design and, in just a few minutes, turn it into a finished die-cut sticker for personal or commercial use.
This walkthrough uses Adobe Illustrator to turn a logo or an illustrated mascot into a custom-shaped die-cut sticker.
1. Set up your Illustrator file
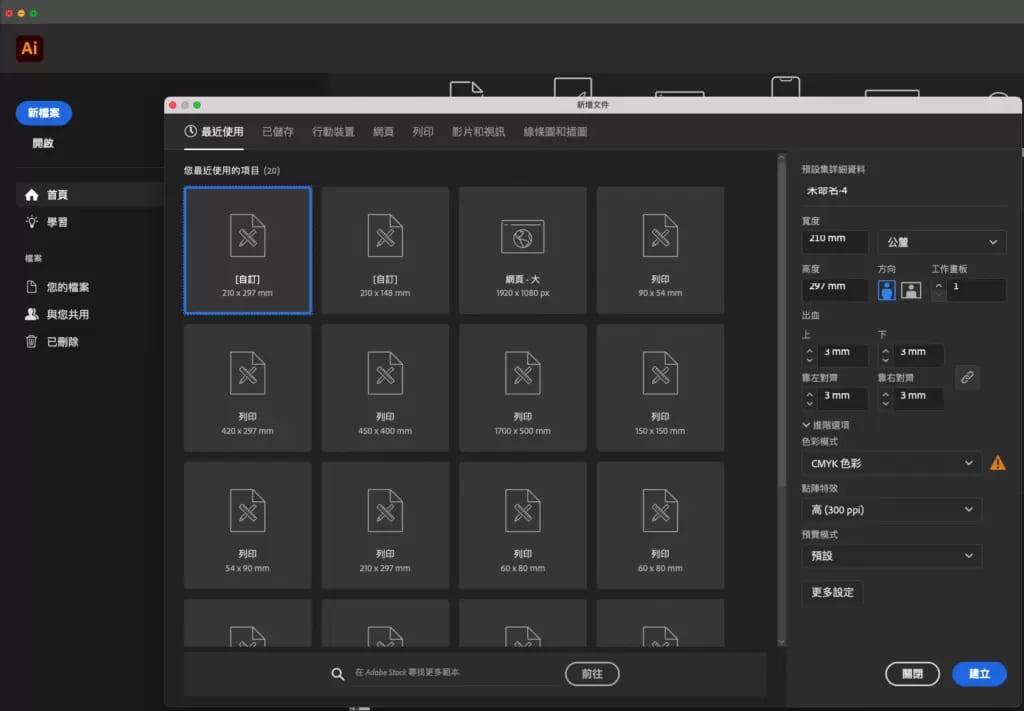
Start by creating a new document in Illustrator. Set the size to A4 (210 x 297 mm) — A4 is the size of the full sticker sheet. If you are printing a single sticker instead, set the artboard to whatever size you want, but never smaller than 25 x 25 mm. Set the bleed to 3 mm on all four sides, the colour mode to CMYK, and the resolution to 300 PPI.
If you are designing one A4 sticker sheet, set the number of artboards to 1; if you have two separate designs, set it to 2.
2. Check the resolution of the artwork you're printing
Printing a sticker from a raster image
Beginners often overlook image resolution. There are two easy ways to check whether an image is sharp enough. Place the image into Illustrator, click on it, and the PPI reading appears in the top-left corner — confirm that it says 300. If it isn't 300 PPI, the print result won't look its best.
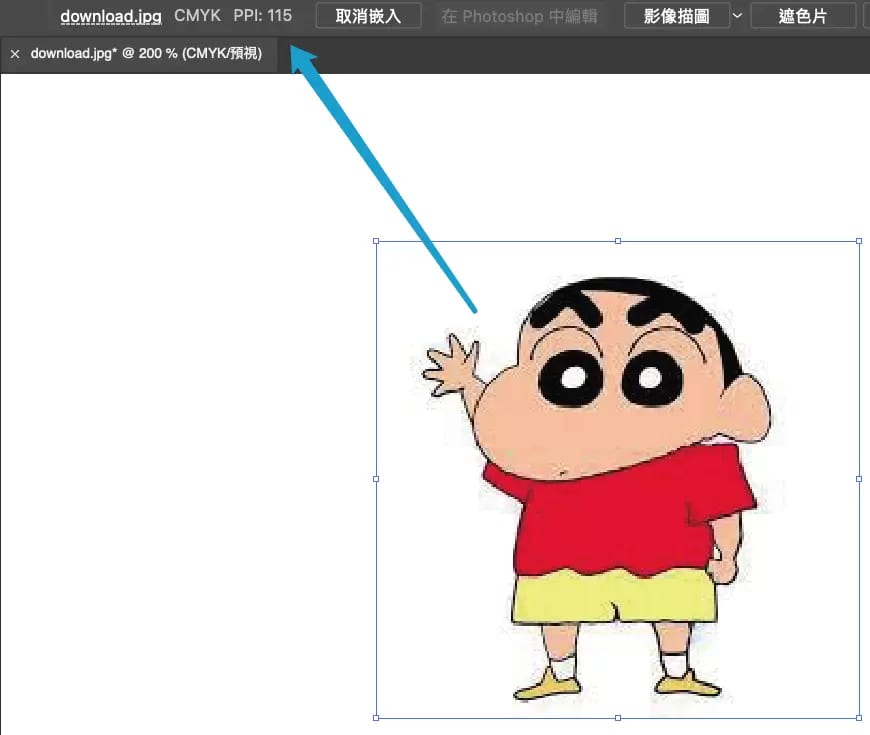
From here you can swap in a different image or use software to sharpen it — but be aware this isn't guaranteed. A blurry image means detail is genuinely missing, and the software only uses AI to fill in those gaps; it can't restore 100% of the lost information. For more on this, see Why do printed images look pixelated or distorted? How to choose print-ready images and enlarge small ones without losing quality.
Printing a sticker from vector artwork
If you already have an Illustrator vector file, you don't need to worry about resolution at all — vector artwork scales up and down inside Illustrator without ever losing quality. In the example below, the small mascot is a raster image, while the red and blue circles are vector elements.

3. Build the die-cut line
From a raster image
Once your image is in Illustrator, make a duplicate of it first: click the image, press Ctrl+C to copy, then Ctrl+Shift+V to paste it in place. This copy is what you'll turn into the die-cut line.
Next, run Image Trace, choose the Silhouettes preset, and Expand — this gives you a solid black silhouette of the image.

Then go to Object > Offset Path, set the offset to 3 mm with rounded corners, and click OK. Convert that 3 mm offset black shape into a red line, delete the leftover black silhouette, and you're done.

Keep the offset at 3 mm where you can, and never below 2 mm. Cutting always carries a small tolerance, so if the die-cut line sits too close to the artwork, the blade can stray into your design.
From vector artwork
Place the vector file you want to make into a sticker into Illustrator, then expand its strokes first. (Vector shapes may carry strokes; expanding them first avoids problems when you offset the path.)

Now apply Offset Path again, at 3 mm with rounded corners. Because vector artwork is made up of several separate shapes, use the Pathfinder's Unite tool to merge them into a single shape, then convert that black shape into a red line — done.

Printing as a sticker sheet: what to watch for

A single A4 sheet can hold several different small stickers, but you must leave at least 2 mm between one sticker and the next. Any gap under 2 mm will compromise the machine's cutting. And, as above, each individual sticker must be at least 25 x 25 mm.
Sticker printing starts at one piece
You can print stickers from a single piece, and any shape works as long as it fits within the 400 x 290 mm printable area. In an age built on brand image, a well-made sticker is a genuinely effective way to raise your profile — whether personal or corporate.
Have other questions about sticker printing? We deliver across Hong Kong and Macau — order custom stickers online, or message us on WhatsApp at +852 3001 5678 (English is fine) and we'll help you get your file print-ready.