The roll-up banner is one of the most widely used promotional products around — whatever line of business you're in, chances are you've come across one. Roll-up banners are popular because they're convenient, durable and reusable, and they come in a range of sizes to suit different spaces.
You'll most often spot roll-up banners at exhibitions and events, where they let visitors take in your company's products and background at a glance. They also work as functional signage — wayfinding, location markers and the like.
Designing a roll-up banner isn't especially complicated — it's certainly simpler than designing a flyer or a booklet. But to design a good one, you need to understand what makes the format tick. A roll-up banner is a fairly large display tool, so there's a bit more to think about.
Here are 8 tips to keep in mind when designing your roll-up banner:
- Use professional design software
- Design in CMYK
- Put your focal point in the centre of the upper half
- Don't cram in too much content
- Use high-resolution images
- Place your company logo near the top
- Put company details at the bottom
- Proofread and export
-
Use professional design software
To present your content clearly to viewers, we recommend using professional design software such as Adobe Photoshop or Illustrator. The most common roll-up banner size is 80 x 200cm; other sizes include 60 x 160cm, 100 x 200cm and 120 x 200cm. Set up your canvas at the size you need and at 300DPI resolution. If your computer keeps hanging on loading while you work, you can drop the resolution to 200DPI — that's the minimum the file should be.
-
Design in CMYK
Because printing is done in CMYK, you need to make sure your design file isn't set to RGB before you start. If you only discover you designed in RGB after the fact, the colour shift in the printed result will be even more noticeable. So a roll-up banner has to be designed in CMYK — otherwise all your work goes to waste.
-
Put your focal point in the centre of the upper half
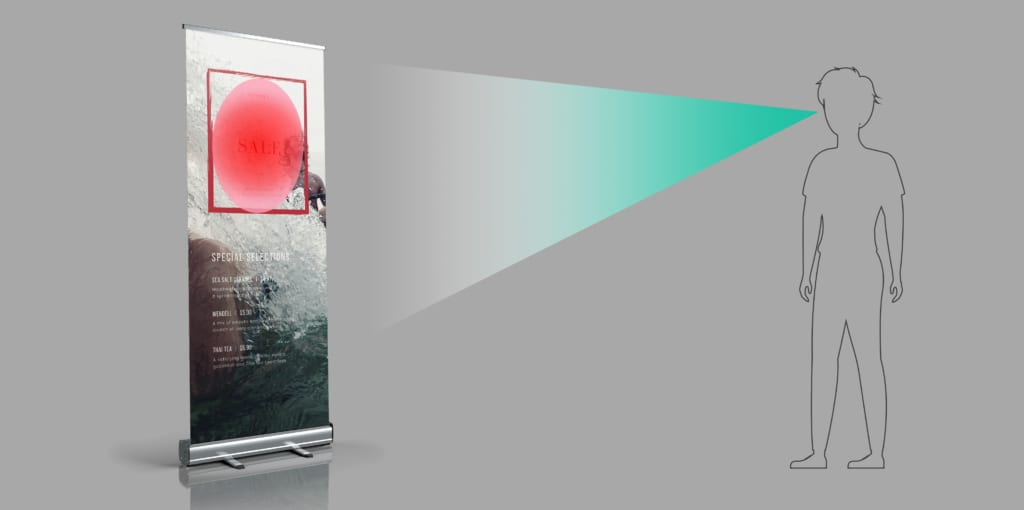
Because a roll-up banner is viewed from a distance and stands at roughly human height, our eyes naturally settle around eye level — that is, the centre of the banner's upper half. So the most important information should go in the red area shown above, with everything secondary placed around it. Think "50% off sale", "buy one, get one free", "custom business card printing" and so on.
-
Don't cram in too much content
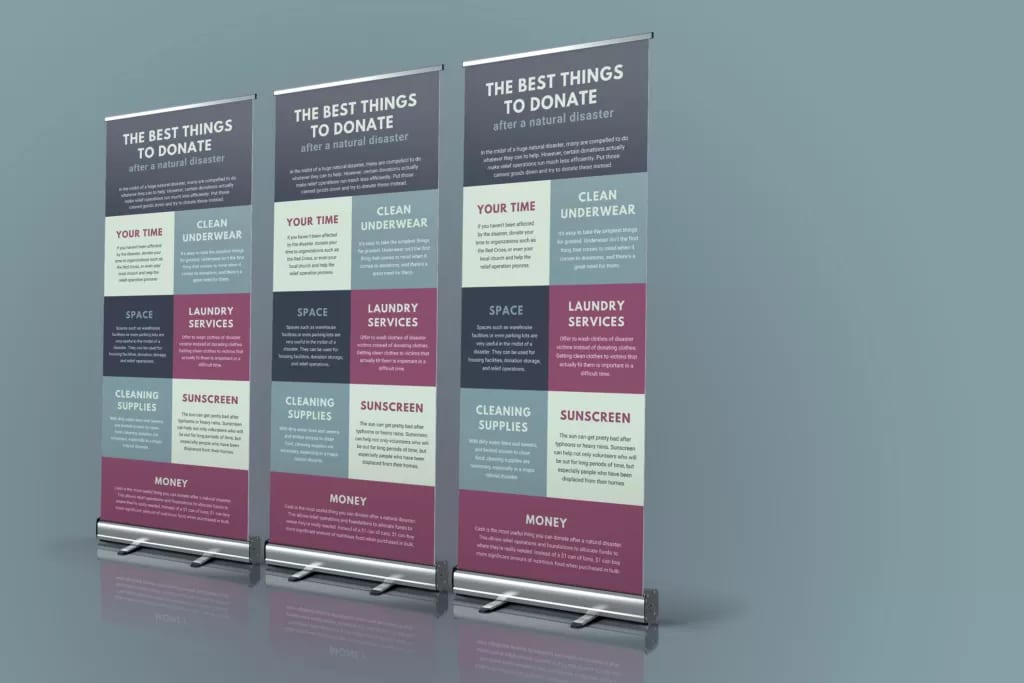
A roll-up banner may be large, but it can't follow your customer home — so resist the urge to load it up with too much information. We once printed banners for clients who don't design much themselves and simply dropped an entire article onto the banner. Not only did it look unappealing, it was hard to read — and remember, more than one person will be viewing it at a time. With today's technology, you can add a QR code so customers can look up more online.
-
Use high-resolution images

Since we set the file to 200–300DPI earlier, the images you use also need to be high-resolution. If you use images that don't have enough pixels, the printed banner will look terrible — the images turn blurry, and in worse cases they pixelate. Stock you download online rarely comes at such high resolution; you can use Photoshop or an online image upscaler to sharpen it up. But if the image is severely blurred to begin with — mosaic-level, say — no tool can fix it, and you're better off choosing different material to save time.
-
Place your company logo near the top
As mentioned, people read a roll-up banner outward from eye level, so the top of the banner is a great spot for secondary but still relatively important content, such as your company logo and phone number. People read from left to right, so the ideal position is the top-left corner.
-
Put company details at the bottom
Most companies today have their own website and Facebook/IG pages, and this kind of informational content can sit at the bottom. Once a customer is drawn in by your focal point, their eyes travel downward and they'll look for company details to find out more. If you want to capture customer information directly, add a QR code here for customers to scan — and at the same time you'll be able to see how many people found you through it.
-
Proofread and export
Once your roll-up banner design is finished, check the content again for mistakes and review the placement of text and images. Our colleagues have come across plenty of amusing typos in files over the years — please check everything carefully before printing, or you'll have to print it all over again. Once you've proofread, you can export as a JPG and send it to your printer.
A good roll-up banner design carries your message straight into the viewer's mind and sparks their interest to learn more. Once you understand the purpose of a roll-up banner and the tips above, your designs should draw in even more people. If you run into any other issues while designing your banner, feel free to get in touch anytime.
Choosing your roll-up banner
Once your design is ready, the next step is printing. Roll-up banner printing mainly comes down to size and style. Sizes run from the smallest 60 x 160cm to the largest 100 x 200cm. Styles come in three finishes — plastic-steel, all-aluminium and teardrop — so browse the roll-up banner product range to learn more. We print and deliver across Hong Kong and Macau — WhatsApp us at +852 3001 5678 (English is fine) if you'd like a hand getting your design print-ready.