How to Remove Sticker Residue: 6 Tested Methods for Any Surface
Adhesive left behind after peeling a sticker? Here's why residue forms — and six tested methods, from hair dryer and rubbing alcohol to white vinegar and WD-40 — matched to each surface so you lift it off glass, metal, plastic, wood or paint without scratching.
ByHayden|印刷與品牌主管Date 一月 15, 2018Read 6 MIN
Fig. 01印刷學2018-01-15
Why does sticker residue happen? (The two-sentence version)
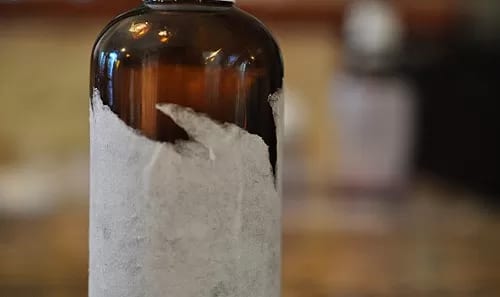
A sticker's backing adhesive ages, bakes in the sun, or has water and cleaning agents seep into it, so the bond turns uneven — and when you peel the top layer off, a film of glue is left behind. Glossy stickers and cheap generic stickers are the worst offenders, and on smooth glass or metal the leftover residue stands out even more.
For shops, window decals are the biggest headache: off-the-shelf holiday and promo stickers (from stationery shops or online) vary wildly in quality, and once they have baked in the sun they age fast — a single clean-up can eat half a day. If you change your display regularly, use removable stickers or cut-vinyl window lettering from the start; it saves time and rarely leaves a mark.
Ground rules: gentle before solvent; test a small patch first; if you can peel it, don't scrape it.
The image above shows a black-background bumper sticker. To check bumper-sticker pricing, click < Get a quote > .
Quick reference: the safest cleaning choice for each surface
Surface
Recommended sequence
Glass / mirror
Hair dryer → alcohol → white vinegar → eraser
Metal (stainless steel / aluminium)
Alcohol → hair dryer → WD-40 → eraser
Painted metal / car paint
Hair dryer → WD-40 (small amount, wait 5–10 min, wash off at the end)
Sealed / varnished wood
Hair dryer → hand cream → alcohol (dab)
Unsealed wood / paper
Hand cream → eraser (gentle)
Common plastics (ABS / PVC / PE / PP)
Hair dryer → hand cream / alcohol (dab) → white vinegar
Clear PC / PS (face shields, clear toys, etc.)
Avoid petroleum solvents; use hair dryer → hand cream / white vinegar
Reminder: after any method, finish with a wipe of mild soapy water — it removes the leftover film so the surface won't attract dust and grime.
How to remove the residue, method by method
Method 1 | Hair dryer (soften with heat)
Best for: glass, metal, painted surfaces, most plastics.
Hold the hot air 8–12 cm away and sweep back and forth for 30–90 seconds.
Lift from an edge slowly, pulling back at less than a 45° angle.
Roll any residue off with the edge of a cloth — don't force-scrape it.
Tip: don't rush by holding heat on one spot too long; keep the hot spot moving to stay safe.
Upside: no chemicals, high success rate. Watch out: plastic warps under heat, so keep the hot spot moving and don't dwell on one point.
Method 2 | Eraser (rub it away)
Best for: paper surfaces, unsealed wood, small patches of residue.
Choose a soft white eraser to avoid colour transfer.
Rub lightly in alternating directions to ball the residue up.
Lift the crumbs away with a strip of adhesive tape.
Tip: you can dab a little water on the eraser before rubbing; keep the pressure light so you don't scuff a glossy surface.
Upside: kind to fragile surfaces. Watch out: glossy plastic scuffs easily, so test a small area first.
Method 3 | Rubbing alcohol (isopropyl ≥70%)
Best for: glass, metal, some plastics.
Dampen a lint-free cloth and lay it over the residue for 1–3 minutes.
Wipe in small circles over a small area, adding more alcohol as needed.
Finish with clean water and a little dish soap.
Tip: alcohol is flammable — open a window for ventilation and keep it away from any flame.
Upside: evaporates fast, almost zero harm to glass. Watch out: don't soak painted surfaces for long, and test coloured plastics first.
Method 4 | White vinegar (acid breaks the adhesive down)
Best for: glass, ceramic, stainless steel.
Lay a vinegar-soaked cloth over the residue for 5–10 minutes.
Wipe gently back and forth; if needed, re-apply vinegar and wait another 5 minutes.
Wipe clean with water so no vinegar smell lingers.
Tip: don't use vinegar on natural stone — it etches the surface.
Upside: a common household item with a milder smell. Watch out: never use it on natural stone (it etches).
Method 5 | Hand cream (surfactant plus softening)
Best for: paper and unsealed wood, materials that can't take solvents.
Spread on a thin layer and wait 3–5 minutes for the adhesive to separate from the surface.
Nudge it away gently with a plastic scraper or the edge of a card.
Finish with warm soapy water to remove the oily film.
Tip: this one is on the gentle side, so test a small area first and expand once it works.
Upside: gentle and relatively safe on paper. Watch out: a thick layer actually makes cleanup harder — go thin, not thick.
Method 6 | WD-40 (strong penetration)
Best for: metal, glass, painted metal (such as car paint), stubborn old residue.
Spot-spray a small amount onto the residue, covering only the sticky area if you can.
Wait 5–10 minutes for the formula to soak in.
Wipe away with a lint-free cloth in one direction; repeat once if needed.
Always finish by washing with warm soapy water to remove the oil film and stop it attracting dust.
Tip: a small, targeted spray is plenty of force, and afterwards finish with warm soapy water so you don't leave an oily film behind.
Safety essentials:
Keep away from flames and stay ventilated (it's a flammable spray).
Avoid petroleum solvents on clear plastics like PC / PS (face shields, clear toys); these materials erode or fog up easily.
Not recommended on waxed wood, leather, or electrical contacts.
Tip: if you'd rather avoid the oily feel, switch to a citrus-based adhesive remover (d-limonene) — similar effect, less residue, but still test a small area first and finish with a clean-up.
Three keys to actually getting the residue off
Manage the timing: rather than scrubbing hard, let the solvent sit an extra 2–3 minutes.
Use the right cloth: microfibre takes less effort than paper towel and won't shed lint.
De-grease at the end: a damp cloth plus dish soap is the final step, or the surface will pick up dust again quickly.
Don't want residue? Use removable or static-cling stickers
If your window display changes every season, or your products need frequent re-labelling, we strongly recommend going straight for:
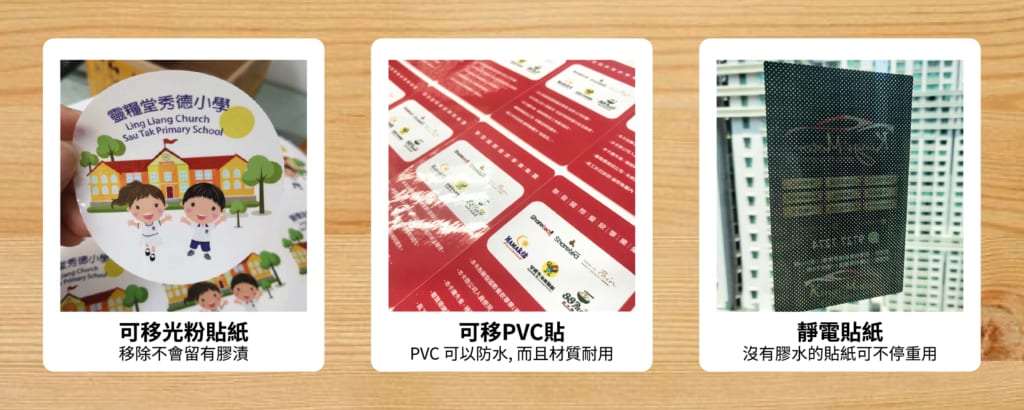
Removable stickers: for short-term events and promo labels — peel off clean, with low residue.
Cut-vinyl window lettering / bumper stickers: easy to apply and remove, ideal for large glass or outdoor use; you can also customise the graphics and text to match your brand colours.
No-residue sticker options
Frequently asked questions (FAQ)
Q1: Does WD-40 damage glass or car paint? In most cases it lifts adhesive safely, but use a small targeted amount, wait 5–10 minutes before wiping, and wash off the oil film with soapy water. For sheet-metal parts about to be repainted, use alcohol or a dedicated adhesive remover instead so it doesn't affect paint adhesion.
Q2: Can I use WD-40 on clear plastic?Not recommended on clear plastics like PC / PS; these materials are easily eroded, whitened, or cracked by petroleum solvents. Try a hair dryer with hand cream, or white vinegar, instead.
Q3: With kids or pets at home, which method is safest? Start with gentle options — hair dryer, white vinegar, or hand cream. If you do use a solvent (alcohol, WD-40, citrus-based), open a window, wear gloves, and keep away from flames, then wash the surface and your hands when you're done.
Q4: How do I save time on a large area of residue? Soften with a hair dryer first and peel the whole sheet away; spot-spray any leftovers with WD-40 or a citrus-based remover, then work zone by zone — wait, wipe, and finish with soapy water.
此文章另有中文版:按此閱讀 · This article is also
available in Chinese.