For a tutoring centre, school, or learning studio, a well-made promotional card is often a parent's very first contact with your brand — before they read a single course detail. It isn't just a way to pass on information; it's the first brick in building trust.
Most education providers hit the same questions when they design and print these cards: What style should we use? Which paper? How do we look genuinely professional and reliable? And when printing in Hong Kong, what practical tricks are worth knowing?
This guide breaks down the design and print essentials for education promotional cards, so a small card can grow into deep, lasting trust in your education brand.
Why one promotional card matters so much for trust
Picture a parent holding two cards from different centres at once. One is cramped, with messy letter-spacing and thin, flimsy stock; the other has a clear layout, an attractive design, and a solid, substantial feel. Even if the courses are broadly similar, the first impression has already decided the winner — which one is worth a closer look gets settled in a few seconds.
For an education provider, a good card isn't about looking pretty. It's about turning professionalism into trust. A clear information hierarchy and a consistent brand voice let parents quickly grasp who you are, what you offer, and why you're dependable. The right stock — we'd suggest a 250–350gsm thick card with a matt or soft-touch lamination — turns "we take this seriously" into a tactile detail, so even the feel of the card speaks for you. When design and paper land together, parents find it far easier to believe you're an education partner they can safely entrust their child to.
Four design keys for a card that earns trust
Winning a parent over isn't about cramming in every fact. It takes a strategic use of visual elements that lets parents feel your brand warmth and professionalism.
1. A clear layout, information at a glance
Parents screening centres are short on time, so the card should let them grasp the key points in 3–5 seconds.
- Visual hierarchy: use size, weight, and colour contrast to lead with what matters most — signature courses, star tutors.
- White space: breathing room stops the card feeling cramped, guides the eye naturally, and makes reading more comfortable.
- Break it into points: use bullets or small sub-headings for course details, class times, and the like, so parents can skim fast.
2. A consistent style that reinforces your brand
A promotional card is an extension of your brand identity; its style should stay consistent with your teaching philosophy, website, and social media to strengthen recognition.
- Logo: place it clearly in a prominent spot with enough surrounding space to build professional credibility.
- Colour palette: colour drives emotion directly. Choose a scheme that conveys warmth, approachability, and professionalism — blues, greens, warm tones — and apply it consistently to reinforce your brand character.
- Typography: pick legible typefaces; a more characterful face can carry the headlines, while body copy stays in a clean, simple font for readability and consistency.
3. Sincere content that resonates with parents
Design is the skeleton; copy is the soul. The content has to answer the questions parents care about most.
- Show your track record: student results, award photos, or parent testimonials act as social proof and noticeably lift persuasiveness.
- Highlight your teachers: clearly list tutors' qualifications, experience, and specialisms — a factor parents weigh heavily when choosing a tutoring centre.
- Make contact easy: phone, address, website, and a QR code all in one place lower the barrier to action and make enquiries instant.
4. Professional imagery that sends a positive message
One high-quality photo is worth a thousand words.
- Avoid canned stock photos: favour real classroom and activity shots for authenticity and warmth.
- Keep photo quality high: use high-resolution images so nothing prints blurry or pixelated; we'd suggest CMYK at 300dpi to keep that professional look.
Printing in Hong Kong: let your budget set the finish, and spend where it counts
Once the design is locked, printing is the final step that turns your effort into real "feel". In Hong Kong the print options are dizzying, and budget usually decides how far you can push them. Whatever the budget, the goal is the same: a professional, presentable finished card.
Let's work through it by budget scenario, and see how to choose paper and finishing wisely.
1. Paper and weight: invest first in the "feel"
The first thing a card's touch tells a parent almost decides its fate. A substantial feel maps directly to "quality" and "sincerity".
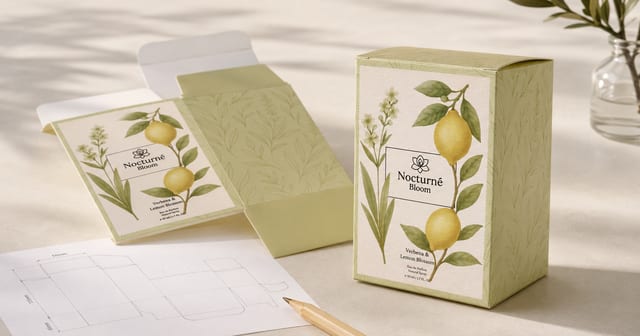
- If budget allows: go straight for a 300–350gsm double-sided matt art card, or a more distinctive textured specialty stock (linen or eggshell finish). A matt art card pairs well with matt lamination or soft-touch lamination — this not only protects the card but gives a grounded, low-glare, wonderfully tactile result. Textured specialty stock cannot — and shouldn't — be laminated, since lamination flattens the very grain that makes the paper special.
- On a tighter budget: a 250–300gsm matt-coated card is already a respectable choice, enough to avoid feeling "thin" or "cheap". If you want to save on lamination, avoid large dark backgrounds with fine reversed-out (white) text so the print stays crisp, and win instead on clean, orderly layout and colour contrast.
2. Finishing: one highlight beats a board full of effects
Finishing is a powerful way to raise the perceived quality — but overdone, it just looks flashy. The rule is: focus, then focus again.
- If budget allows: on top of matt or soft-touch lamination, pick just one or two feature processes. Hot stamping or spot UV on the logo or a core tagline instantly creates a visual focal point. For an extra detail, consider rounded corners or subtle embossing.
- Pro tip: for spot UV, you must laminate matt first — the gloss-against-matt contrast is what brings out the depth. Keep foil lines no thinner than 0.25mm and text no smaller than 7–8pt to guarantee a clean result.
- On a tighter budget: with no budget for extras, keep it clean with matt lamination and let layout and colour create the sense of depth. If you're especially drawn to a paper's texture, choose a lightly textured stock — but don't laminate it. Remember: simple and clean is far more presentable than a jumble of effects.
3. Size and quantity: save reliably by standardising
- Size: favour standard sizes like A6 or A5 (and remember to set a 3mm bleed).
- Quantity: for small runs (a few hundred), digital printing is flexible with fast turnaround; once you need several thousand or more, offset printing is cheaper and gives more consistent colour.
- Colour: unless your brand demands strict spot colours (Pantone), stick to CMYK four-colour printing to avoid spot-colour charges.
Two "professional and presentable" print specs to reference
- Upgraded spec: 350gsm matt-coated card + soft-touch lamination + hot stamping / UV.
- Effect: grounded and detailed — parents feel the brand's "investment" the moment it's in their hand.
- Value spec: 350gsm matt-coated card + double-sided gloss or matt lamination (or no lamination at all).
- Effect: a clean layout that never feels thin — a professionalism that won't embarrass you, with the effort focused on the design content itself.
A quick pre-press checklist before you print
- File is in CMYK, images at 300dpi.
- File already includes a 3mm bleed on every side.
- Minimum body text is at least 9–10pt (Traditional Chinese has complex strokes, so watch this carefully).
- QR code at least 20mm × 20mm, with enough "quiet zone" around it.
- If you're using special stock or finishing, always approve a proof before the full production run.
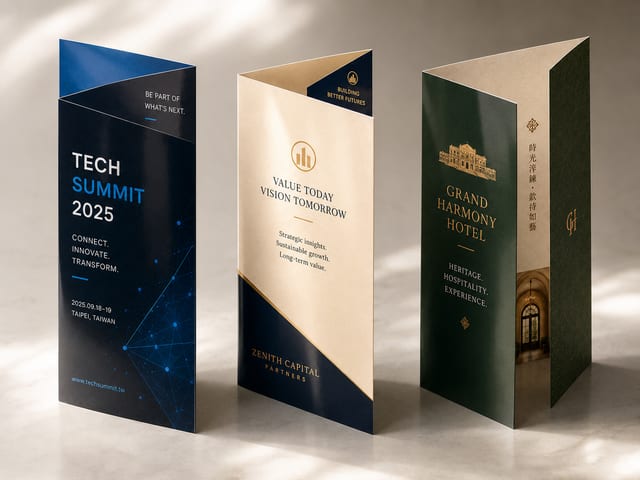
Hong Kong's most-used card size is 90×54mm, for very practical reasons: it's easy to slip into a wallet, easy to hold, easy to keep. When there's more to say, A6 balances readability and portability; when you need to show a process and FAQs, a DL tri-fold gives you columns that divide the content far more naturally. Whichever you pick, the layout rhythm follows the same principle: confirm the source top-left (logo), state the topic clearly in the middle, and put the action bottom-right (QR / WhatsApp).
Technical notes: 3mm bleed all round, and keep important text at least 3mm from the trim edge; a QR code face of at least 15×15mm, with clear space around it — and before mass production, test-scan it on a range of phones.
Paper and finishing: let the feel do the talking
An ivory board or double-sided gloss art card at 300–350gsm feels reassuringly solid the moment you pick it up; if you want durability and low glare, matt lamination is a safe choice. Finishing exists to flag the important bits, not to steal the show:
- Spot UV on a date, a number, or the CTA block — the gloss-versus-matt contrast holds the eye.
- Hot stamping or embossing in just a small patch — on the school crest, a slogan, or a key cover word.
- For kindergartens and early-years, rounded corners give a friendlier feel in the hand.
Prepress notes: use K100 for hot-stamping and varnish black artwork; keep fine text at 7pt or above and line widths not too thin; large solid-black areas can use a rich black (for example C60 M40 Y40 K100).
From offline to online: make the next step easy
Once the card holds attention, the follow-through should be smooth. Add a short UTM tag to your QR link (for example utm_source=card&utm_medium=print&utm_campaign=edu_hk_2025) and you'll see which channel is starting conversations; make the sign-up entry a lightweight form (name, contact, year group) and push everything else to WhatsApp; keep the website and social visuals aligned with the card's key art so parents feel a sense of continuity.
(If your event also needs a backdrop, retractable banner stands, or floor signage, plan a consistent look at the same time and extend it to your large-format inkjet printing pieces.)
Local scenarios: a few quick references
- Kowloon Tong · Parent Day DL tri-fold: the outer cover keeps one message and the date; open it up and the left column is the schedule, the right column a walking map and a QR. Parents just hold the card and follow along.
- Taikoo · Course card 90×54mm: a clean topic and hands-on photos on the front; three tidy lines of information on the back, with a WhatsApp + QR as a consistent CTA bottom-right, plus "2-minute walk from Quarry Bay Station Exit C". Hand them out at lunchtime, and enquiries tend to cluster in the early evening.
- Tuen Mun · A6 reference card: a grammar quick-reference laid out as a table, with a low-key logo + QR living at the foot of the card; both parents and students reach for it before exams, and brand credibility quietly builds through everyday use.
Practical notes (Hong Kong)
After sign-off, delivery typically takes 3–5 working days; multi-process jobs or peak season run around 5–7 days. We can courier locally or arrange pickup, and quotes are stated in HKD with tax status noted. Keep one primary contact CTA: WhatsApp us at +852 3001 5678 (state your reply hours or turnaround clearly) alongside a phone line — English is fine, and we deliver across Hong Kong and Macau.
The bottom line
A card doesn't need to be fancy. Its job is to say the important things clearly and make the next step easier. When a parent can read the key points in ten seconds and finish a scan or a message in thirty, the card has done its work — and the feel and sense of order it leaves behind will, through later enquiries and campus visits, turn into trust in your school.