Perfect-bound book printing asks more of your artwork than a single flyer does — and the mistake people make most often is ignoring how the inner pages sit against the glued spine. A layout looks perfectly tidy on screen, but once it's bound, the inner edge of every page vanishes into the spine glue: page numbers, fine type, QR codes or image detail set too close to the gutter can become hard to read.
This guide focuses on the spots that go wrong most often before you send files: the 10mm spine allowance, the 13mm safe distance, the inner side of left and right pages, page numbers, full-spread images, the cover spine, and your PDF.
If you haven't decided what to print, which binding to use, or what file to send yet, start with our pre-print master checklist. If you've already settled on perfect binding and started laying out the inner pages, this article should help.
Reserve a 10mm glued-spine allowance at the gutter
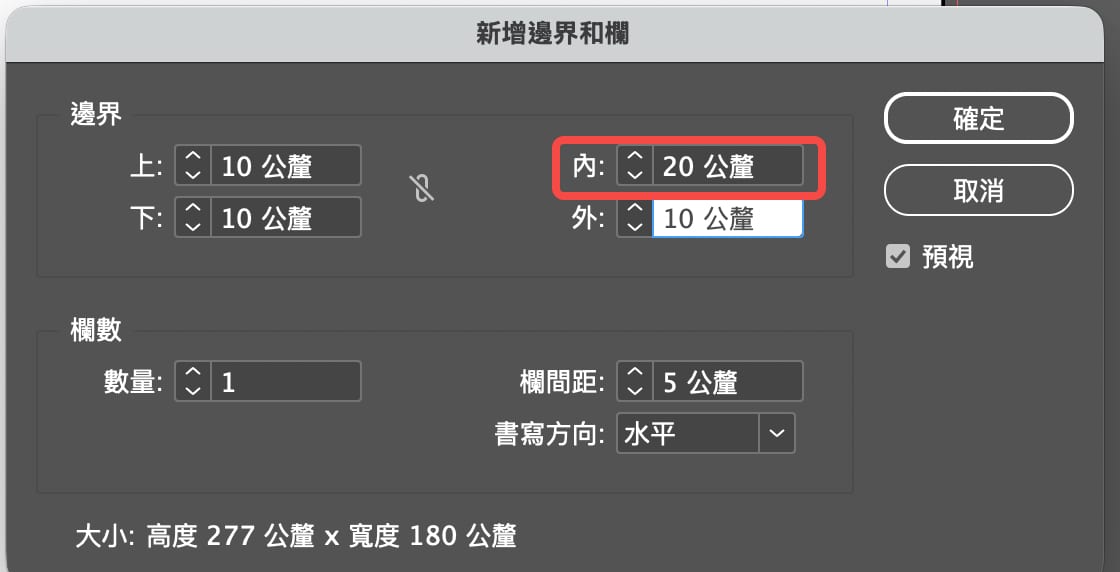
On a perfect-bound book, the inner side of each page — the side next to the spine — should have a 10mm glued-spine allowance reserved first. Don't place important text, page numbers, small icons, QR codes, or anything that needs to be read in full inside this zone.
In InDesign you can set this with margins:
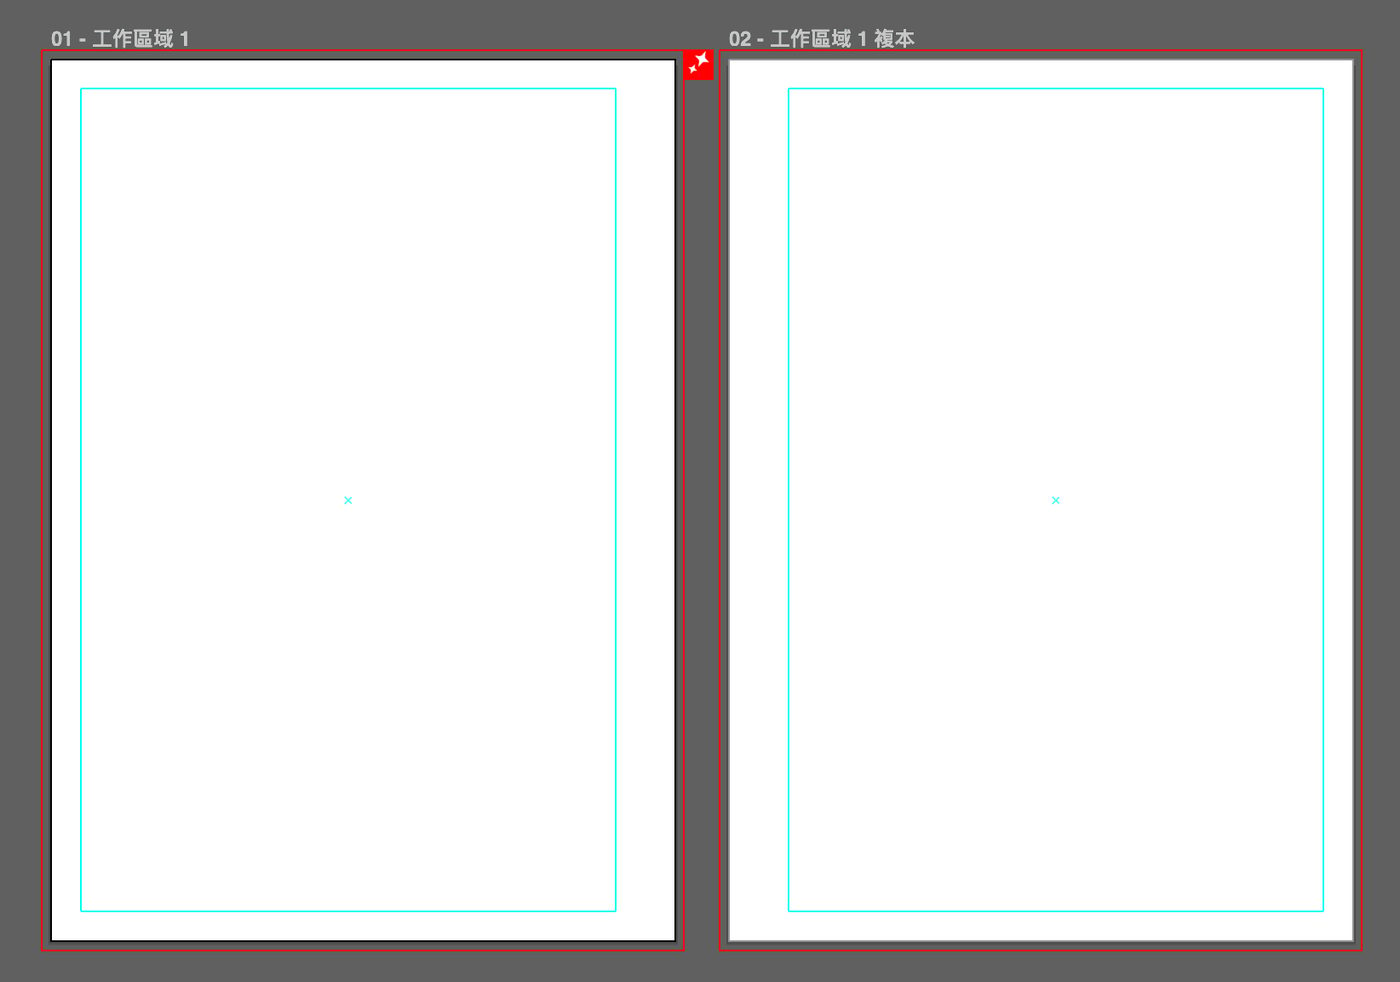
In Illustrator you can mark out the design area with guides:
| Position | Recommended handling | Remark |
|---|---|---|
| Inner (spine) side | Reserve at least 10mm for the glued spine | Keep key content out of here |
| Important content | At least 20mm from the glue edge | 10mm glue + 10mm safe margin |
| Trim edge | Keep non-bleed content at least 3mm from the edge | Don't crowd the edge |
| Full-bleed background | Add 3mm bleed | Prevents white edges after trimming |
For non-bleed important text, logos, page numbers and QR codes, keep at least 3mm from the trim edge. If a background colour, base image or photo needs to run full-bleed, don't stop at the finished-size line — prepare bleed to the product's spec before you submit, so you don't get white edges after trimming.
Also remember as you lay out: on a left-hand page the spine is on the right edge, and on a right-hand page the spine is on the left edge. Don't apply one identical four-side margin to every page, or your page numbers or body text may end up too close to the spine on one side.
| Page position | Watch for |
|---|---|
| Left page, inner side | The right edge is the spine — keep key content clear |
| Right page, inner side | The left edge is the spine — don't crowd page numbers or text |
| Outer edge | Leave a trim safety margin; don't crowd the edge |
| Spread centreline | No faces, QR codes, prices or fine type |
Put simply: the glue margin is where you can't place anything important; the safe distance is what makes important content comfortable to read; and bleed is for full-bleed backgrounds. Keep the three separate.
Don't guess the cover spine width yourself
If your perfect-bound book has spine text or a wraparound cover design, don't estimate the spine width yourself. Spine thickness depends on the page count, paper thickness and cover construction. A book with few pages may not suit very small spine text; a book with many pages needs the spine, front cover, back cover and bleed all confirmed.
For a more accurate spine thickness, ask the Printing Banana team — we're happy to help.
Keep page numbers off the spine — and don't just centre on the full page
Page numbers are small, but they shape how the whole book reads. Once a perfect-bound book is opened, the inner area near the spine is affected by the glue margin and the curve of the page, so page numbers shouldn't sit in the inner corner, and shouldn't hug the bottom or trim edge either.
If a page number needs to be centred, don't calculate it from the full page size — subtract roughly 10mm of glued-spine allowance on the spine side, then centre visually within the readable area. Otherwise it can look dead-centre in the PDF but appear pushed inward or off to one side once printed.
The safer approach is to place page numbers on the outer side or somewhere easy to see. Important content — including page numbers — should sit at least 13mm from the glue edge, i.e. 10mm of glue plus a 3mm safe margin.
Full-spread images and tables need extra care
Some designs run a large image across two pages, or push a table, schedule or product list close to the spine. That looks complete in the PDF, but once printed as a perfect-bound book, the centre may not lie completely flat, and the area near the spine is affected by the glued allowance.
If you're running a full-spread image, plan around the roughly 10mm glued-spine allowance on the inner side. Put simply, the area near the spine on both the left and right pages can get partly "swallowed," so a spread background shouldn't just be aligned to the centre of the artboard. The safer approach is to shift each page's base image about 10mm outward, so the important part of the picture doesn't land right on the spine.
Artwork setup:

Finished result:

Design cautions
If an image is just an atmospheric or background shot, a spread is unlikely to cause much trouble; but if a face, product detail, text, price, table content or QR code happens to fall near the spine, it hurts both reading and scanning. This key content should avoid the spread centreline and stay within the safe area. Keep important faces off the spread centreline.
Product specs, prices and tables shouldn't sit close to the spine.
QR codes shouldn't be placed in the inner curve or across the spread.
Spread backgrounds can stay, but move key content away.
Check images, colour and file format together
Book inner pages usually mean lots of images and lots of pages, so a single low-resolution image or missing linked file can risk a reprint. For product material, use images at 300dpi or higher at 100% size, and produce them in CMYK.
Before submitting, also confirm your text is outlined and your images are embedded or correctly linked. Perfect-bound books accept PDF / AI / PSD; if special finishes such as foil stamping or embossing are involved, submit as an AI file.
If you've assembled your content in Canva, PowerPoint or another tool, reopen and check the exported PDF once more. Don't just look at the thumbnail — zoom to actual size to inspect images, page numbers, QR codes and fine type.
Sizing is a separate topic — at file prep, watch one thing
If you haven't decided between A5, B5 or A4, start with how to choose a perfect-bound book size. The sizing article helps you judge "how big the book should be"; this one only handles the pre-submission check of "whether any content sits too close to the spine or trim edge."
Whether you end up with A5 or A4, the check is the same: look at the inner glue margin first, then the outer trim safety margin, and finally check type, page numbers, QR codes and images at actual size. Don't push page numbers to the spine just because A4 gives you more room, and don't cram fine type into the inner side just because A5 gives you less.
Final checklist before you submit
Run through this quick checklist before sending files:
Have you reserved 10mm of glued-spine allowance on the spine side?
Are page numbers, QR codes, prices and important text at least 13mm from the glue edge?
Are non-bleed text, logos and images at least 3mm from the trim edge?
Have full-bleed backgrounds, base images or photos been given 3mm bleed?
Have you checked the inner spine side of left and right pages separately?
Do full-spread images keep faces, product detail and important text clear of the spine?
If you have a wraparound cover, have you confirmed spine thickness, front cover, back cover and bleed?
Are images 300dpi or higher at 100% size?
Are the files in CMYK?
Is the text outlined, or the fonts correctly embedded in the PDF?
Are images embedded or correctly linked?
Did you reopen and check the PDF after exporting?
FAQ
Why do perfect-bound books need a spine allowance?
Because a perfect-bound book is glued together at the spine, the inner side of each page — next to the spine — is covered by the glue margin and the page curve. Important content set too close to the inner side may be unreadable or hidden once bound.
Should page numbers go on the inner or outer side?
Generally it's better to place them somewhere easy to see, avoiding the inner side too close to the spine. Whether inner or outer, keep clear of the glue margin and trim edge and leave enough safe distance.
Can I use full-spread images in a perfect-bound book?
Yes, but don't put key content in the middle near the spine. Backgrounds or atmospheric images are easier to handle; faces, QR codes, product specs and text should avoid the spread centreline.
Can I print a perfect-bound book from a PDF only?
It depends on whether the PDF is exported to print spec. If the size, CMYK, image sharpness, embedded fonts or outlined text, glue margin, safe distance and bleed are all correct, a PDF is easier to work with. Reopen and check the PDF once more before submitting.
If I haven't decided between A5 and A4, which should I read first?
If you haven't picked a size yet, read the perfect-bound book size article first; once the size is set and your inner pages are laid out, come back to this pre-submission checklist for the glue margin, page numbers, safe distance and PDF export.
Ready to print your perfect-bound book?
Before submitting, check the spine glue margin, the inner side of left and right pages, page numbers, full-spread images, bleed, image resolution and PDF format.
If you already have a draft PDF or artwork, run it through the checklist above, then look over Printing Banana's perfect-bound book printing (from 1 copy) page to confirm the basic options. We deliver across Hong Kong and Macau — when you get in touch, send your PDF along with the size, page count and cover orientation, and message us on WhatsApp at +852 3001 5678 (English is fine) so we can advise on the spine position and file setup.