What Is Bleed?
Bleed is the extra margin of your design that extends beyond the final trimmed size of a printed piece. Its job is to absorb the small cutting errors that happen on every trimming machine, so no unintended white edges appear on the finished product and your artwork stays complete right to the edge.
Bleed is normally set to 3mm, and it has to be built in before you start designing. If a print shop spots a file with no bleed during pre-press, it will almost always ask you to fix it — the whole point is to protect the size, content, and look of the finished print.
- The second half of this guide walks you through setting up bleed in professional software and in free online tools.
Why Add Bleed?
First, understand that an A4 printed piece is never actually printed on A4 paper. It's printed on a larger sheet and then trimmed down to size. Both the printing and the cutting are done by machine, and if the sheets aren't perfectly aligned or the machine is slightly off, the image can end up shifted. Printing on an oversized sheet and cutting afterwards makes it far easier to adjust and correct.
This matters most on smaller products — a business card (90 x 54mm), for example — where a shift of just a few millimetres throws off the whole layout. To guarantee a clean, complete image, bleed is essential.
Send a file with no bleed to print and you risk white edges, or having part of the content near the edge trimmed away. So whatever you're printing, always add bleed before you go to press.
How Much Bleed Do You Need?
The common industry-standard bleed is 3mm. A 3mm bleed means adding 3mm on every side — top, bottom, left, and right — beyond the final size. For example, a card measuring 90 x 54mm has a bleed size of 96 x 60mm (90+3+3, 54+3+3).
Quick question: if you need to print a 148 x 105mm postcard, how much bleed do you add?
Once bleed is set up, remember to extend your background colour or background image all the way out to the bleed edge as you design — a natural extension of the artwork. That way, even if the trim is slightly off, you won't be left with an odd white edge.
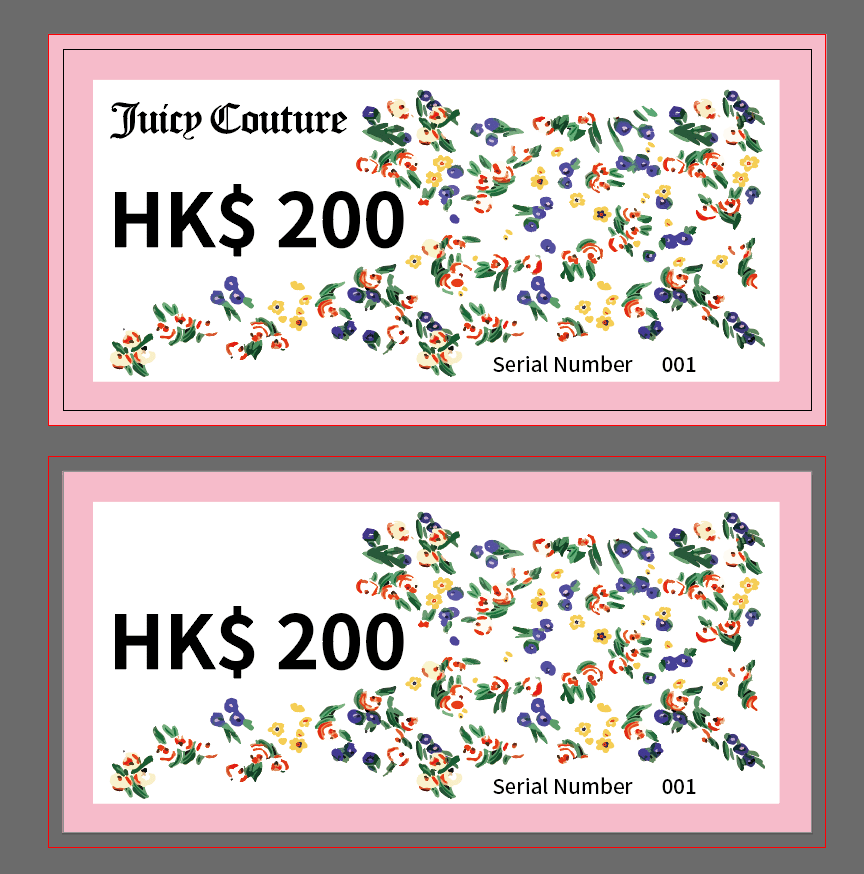
Diagram: the black line is the final trim size, the red line is the bleed. The top layout shows a correct file; the bottom one is incorrect.
How to Set Up Bleed, Tool by Tool
(1) Bleed in Illustrator (AI)
Adobe Illustrator (AI) is Adobe's software built specifically for print and publishing, so it gives you high-precision control over the layout of flyers, posters, books, and other printed matter. Crucially, AI works with vector graphics, so nothing degrades when you scale it up. It also has a built-in bleed function — just follow these steps.
- Create a new document, choose Print, and enter your final size.
- Most printed pieces are double-sided, so you can set the number of artboards to 2.
- Enter a bleed of 3mm.
- Make sure the colour mode is set to CMYK.
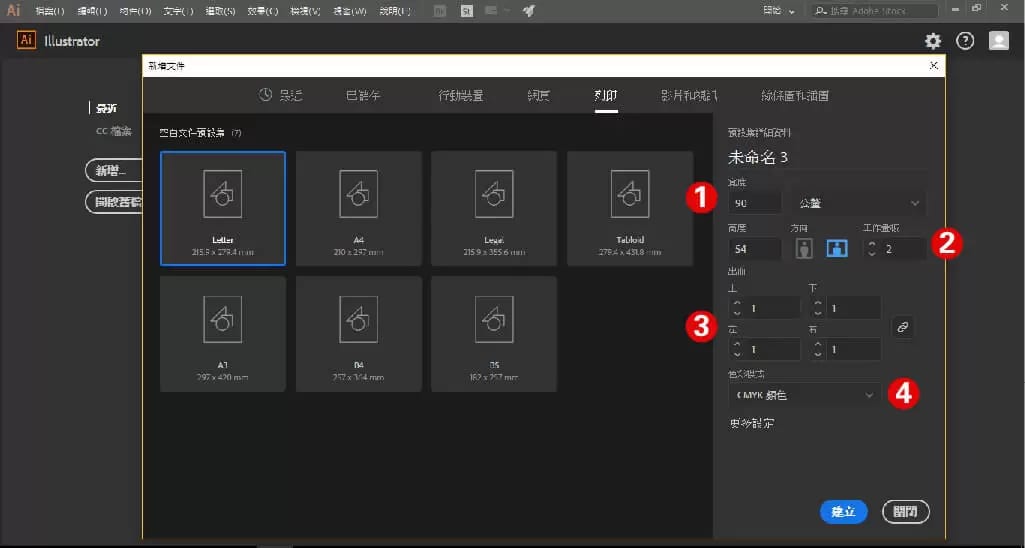
- Bleed setup complete.
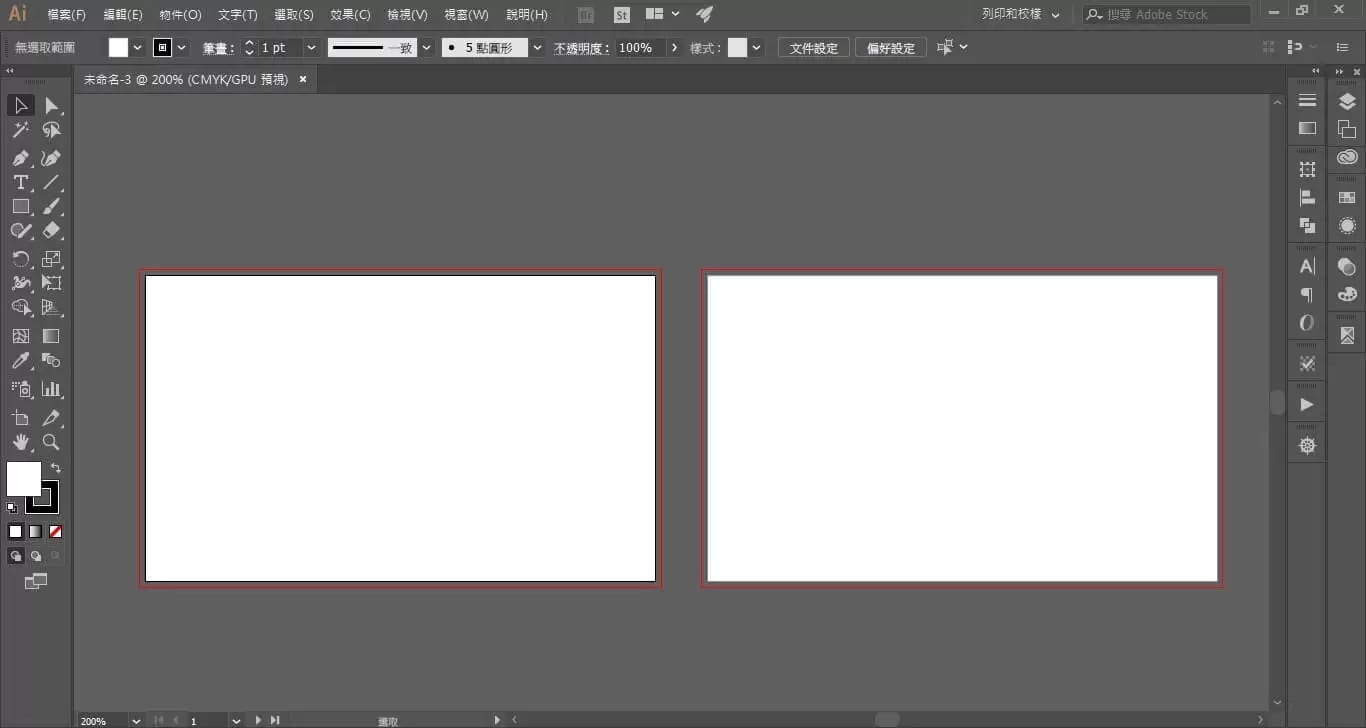
(2) Bleed in Photoshop
Adobe Photoshop is built for image editing, so it isn't as strong as AI for layout and graphic design, and it has no built-in bleed setting. Too many people who aren't confident designers still use PS to build print files, and at Printing Banana we don't really recommend it. That said, here's a workaround that gets you a close approximation of bleed in PS — set it up like this.
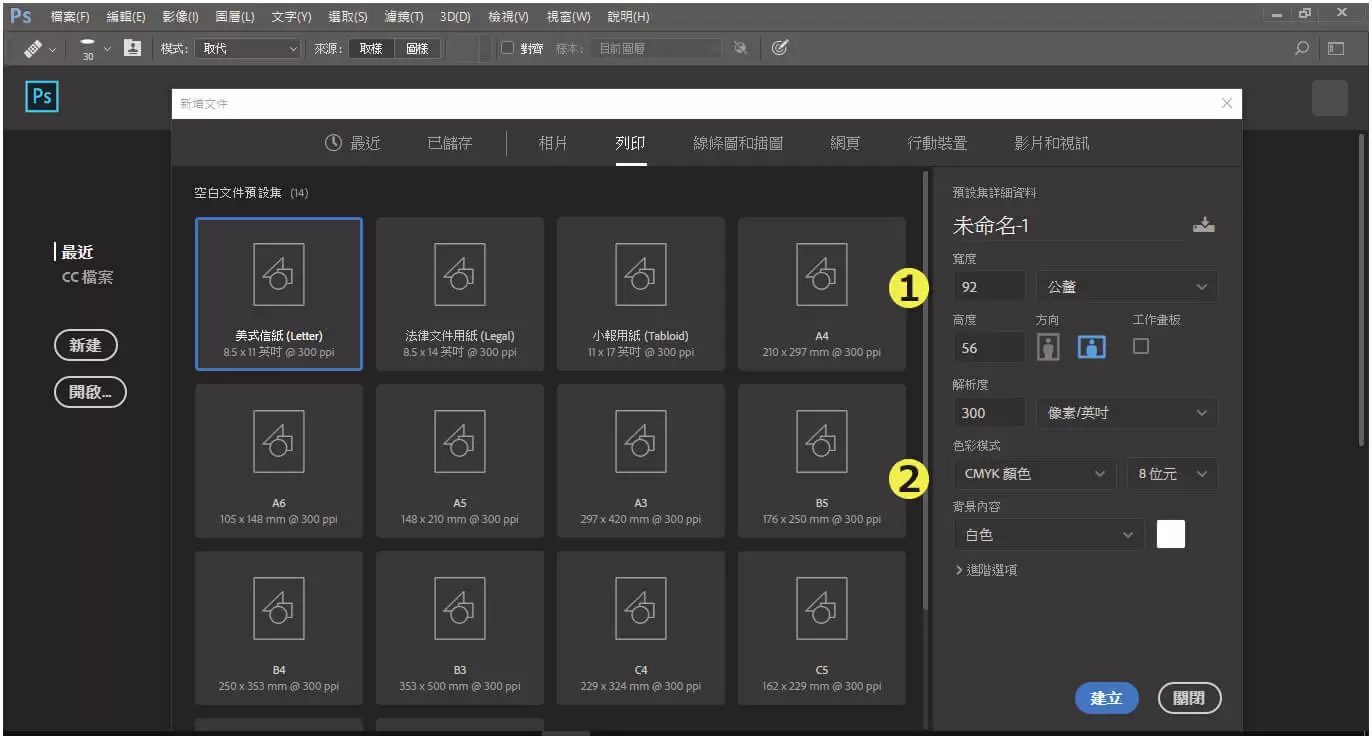
- Create a new document, choose Print, and enter the bleed size. For example, if the final size is 90 x 54mm, the bleed size is 96 x 60mm — 3mm on every side.
- Make sure the resolution is set to 300 and the colour mode is CMYK.
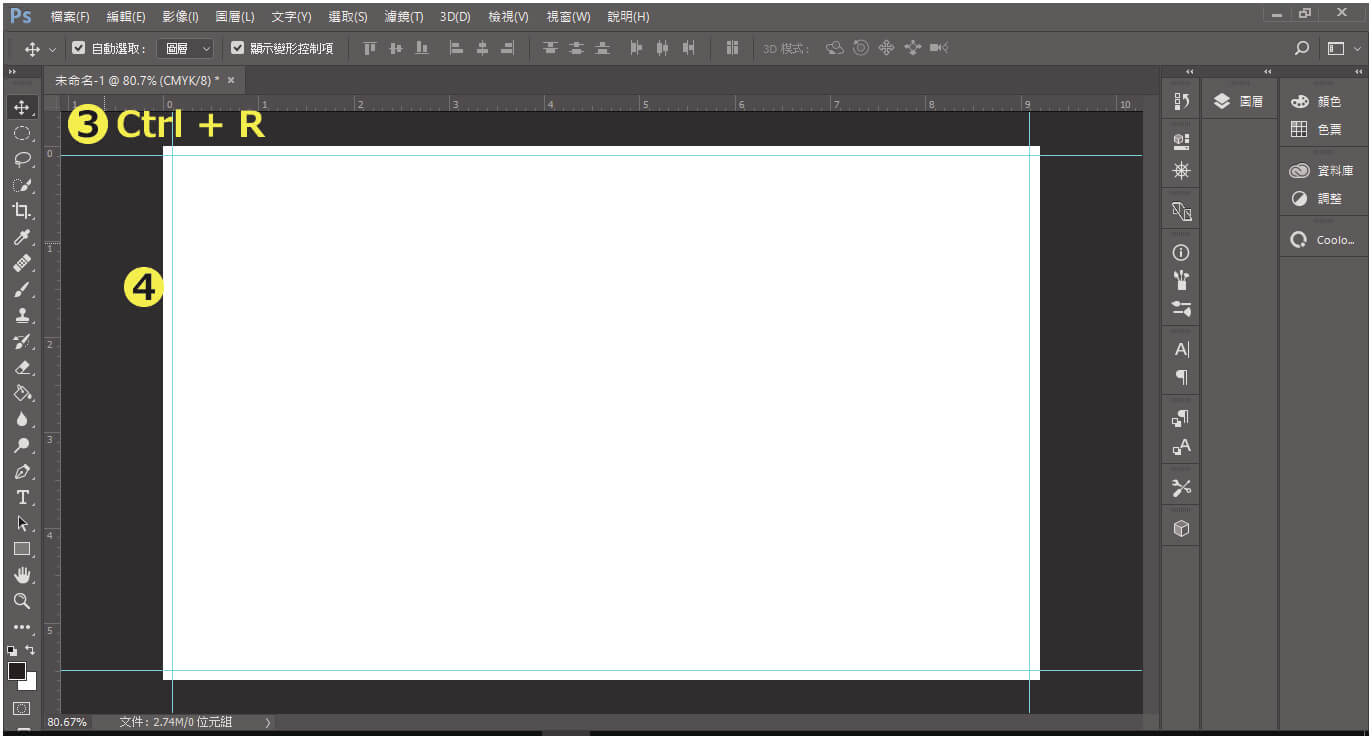
- With the file open, press Ctrl + R to bring up the rulers.
- Then drag out four guides, each 3mm in from the four edges.
(3) Bleed in Canva
Canva is an online design platform packed with templates, and it's simple and convenient to use. Its standout feature is a bleed function — not something every online design platform offers — which is why we strongly recommend it. Here's how to add bleed in Canva with ease.
- Pick the template you want; once you click into it you'll see the screen below.
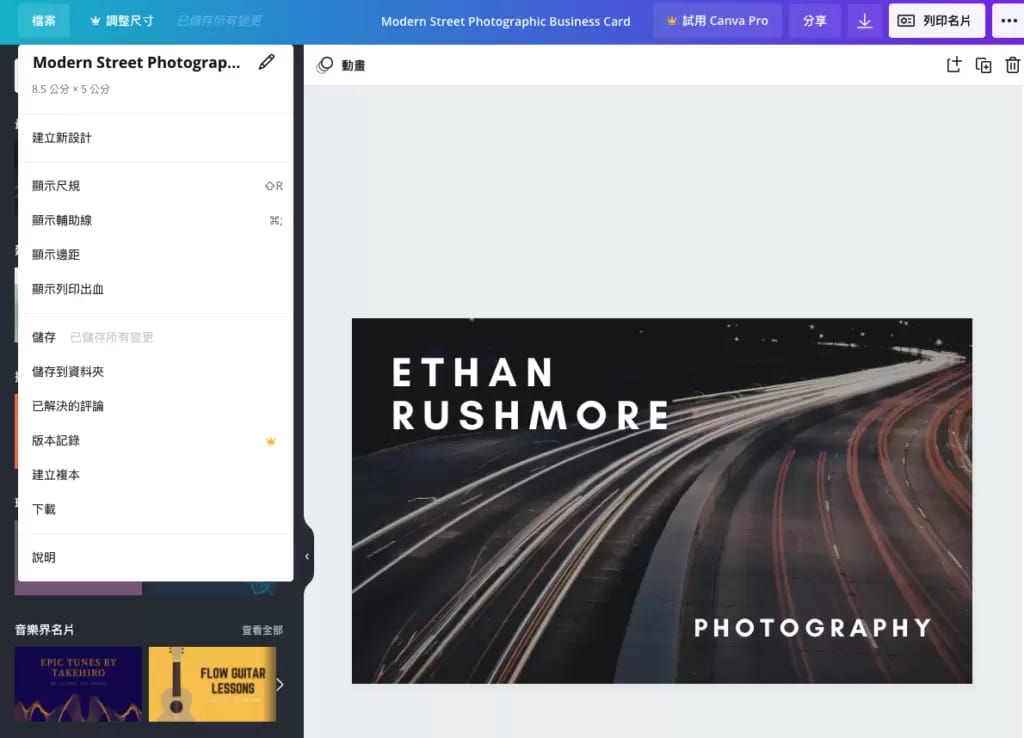
- Before you start designing, turn the bleed on: File » Show print bleed. You'll notice the design canvas gets larger — that extra area is exactly the 3mm bleed. Now check that your artwork fills the whole bleed area; if it doesn't, stretch it out to fill.
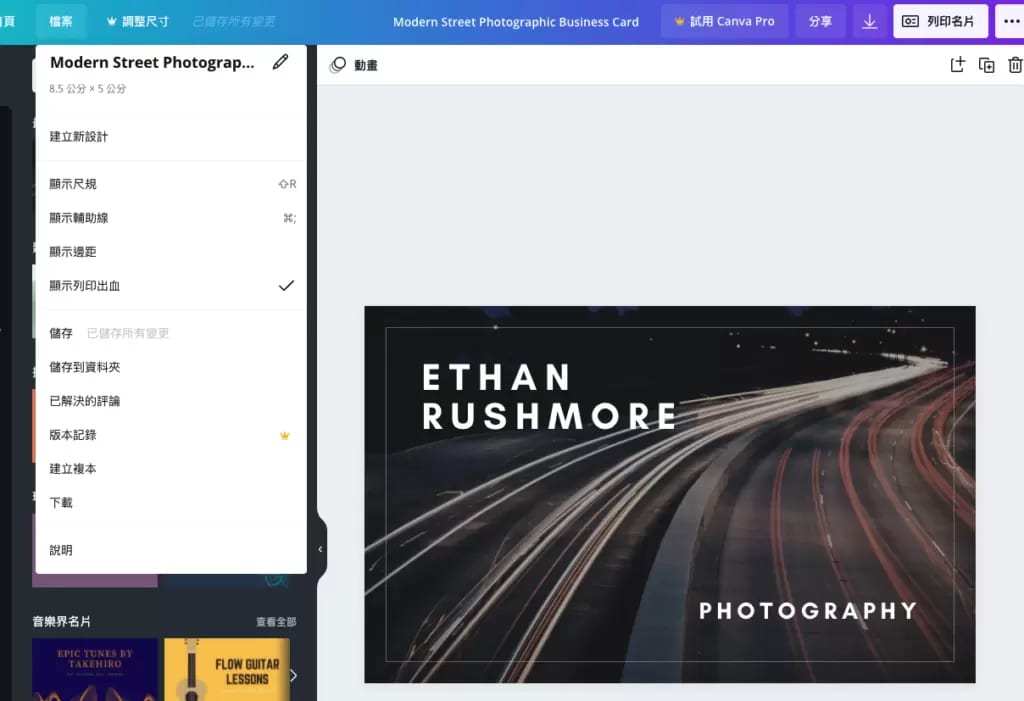
- With bleed set up, you can start designing your content. To make design easier, open up all the tools — you'll have far more to work with.
Tip: keep all text and important information inside the visible frame for the best print results.
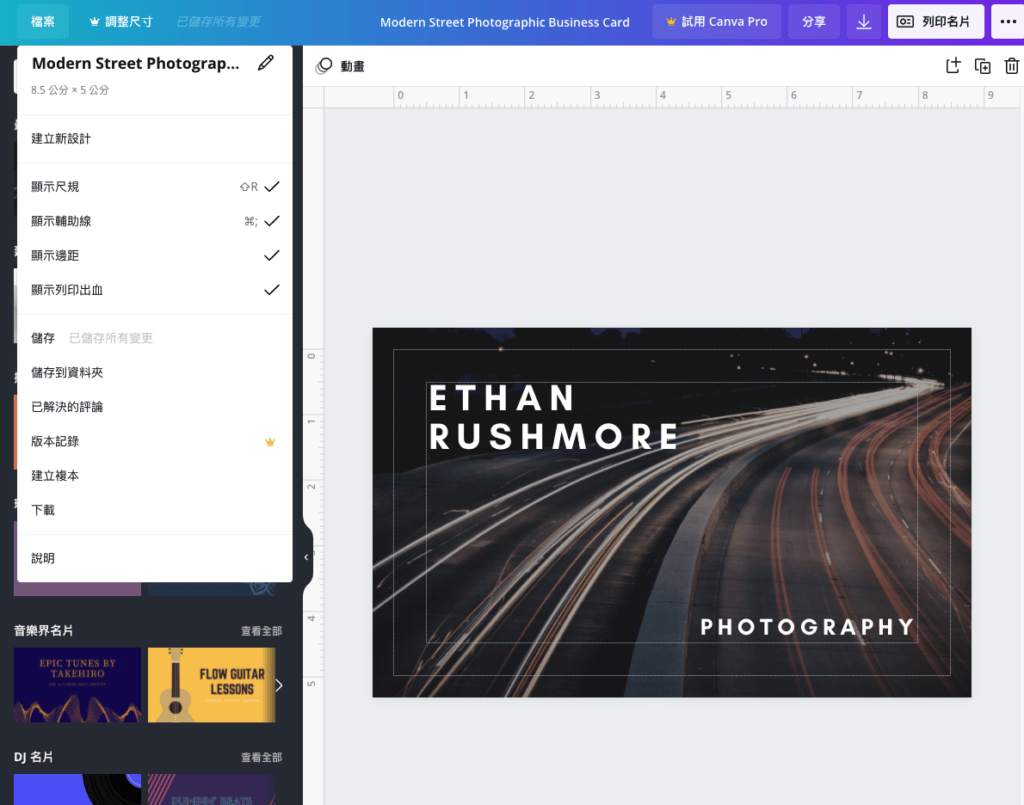
We hope this guide gives you a clearer picture of what bleed is and how to set it up. If you have any other questions, our team is happy to help — WhatsApp us at +852 3001 5678 (English is fine), and we deliver across Hong Kong and Macau.